Basic setup
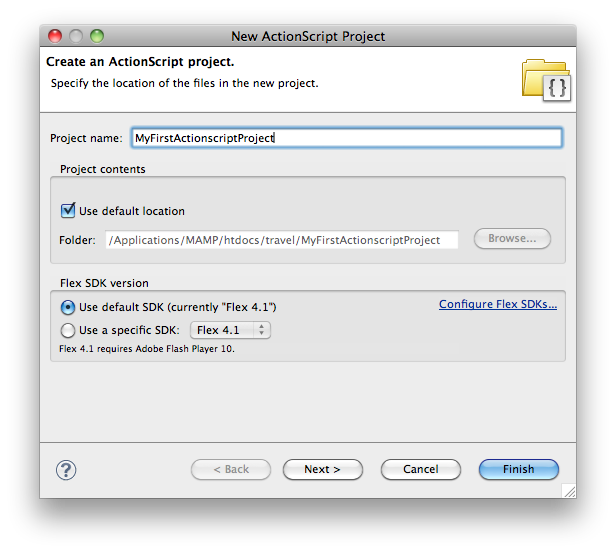
First we have to create a new project in Flash Builder, go to File → New → ActionScript Project.
You will see a dialog where you can fill in your project details. Fill in your Project name and press the Next button.

Change the Main application file to Main.as, this is just a convention. Press finish to complete your project setup.

Flash Library
Now, the only thing we have is an empty AS3-project. We can use Flash Builder to write our classes etc., but most projects will need some graphics. Thats where the Flash IDE comes in.
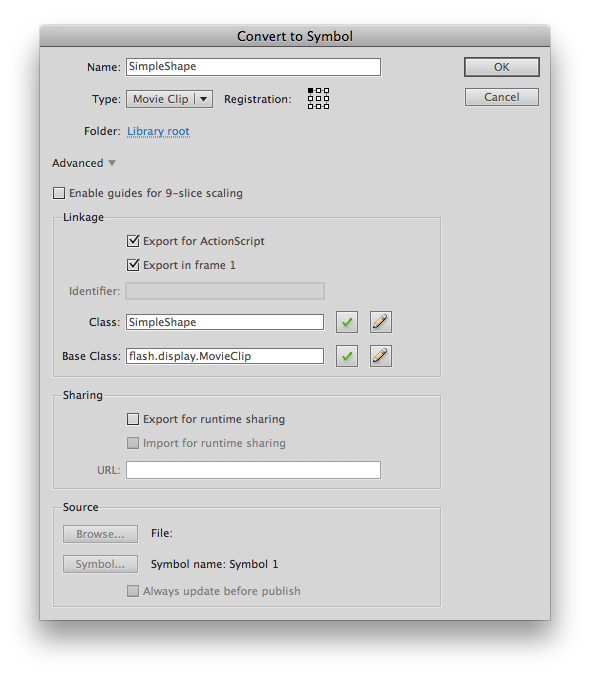
Make a new .fla-file and make a MovieClip with a very basic drawing in it. Go to the properties of the MovieClip.
Tick Export for ActionScript and change the classname (‘Class’) to ‘SimpleShape’. You schould have something like this:

Because we want to use the library of this .fla-file with Flash Builder, we have to make a .swc-file. You can learn more about .swc-files in this Stackoverflow question.
To let your .fla-file generate a .swc-file, go to File → Publish Settings. Next, go to the Flash-tab and thick Export SWC.

Press the OK-button. Every time you change something in your .swf-file, you will have to publish your .swc-file again to make sure it contains the latest updates of your library. You can generate a .swc-file with the shortcut command + return.
Link the SWC to your Flash Builder project
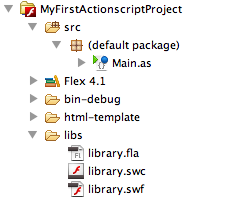
Go back to Flash Builder and make a new folder named ‘libs’ in your project. Here you can put all your resources for the project. The structure of your project should look like this:

Go back to the Flash IDE and save your .fla-file in the folder libs you have just created in your Flash Builder project. The location of your project depends on your workspace in Flash Builder.
Save the .fla-file as library.fla and again create a .swc-file (command + return). Go back to Flash Builder and your project structure now should look like this:

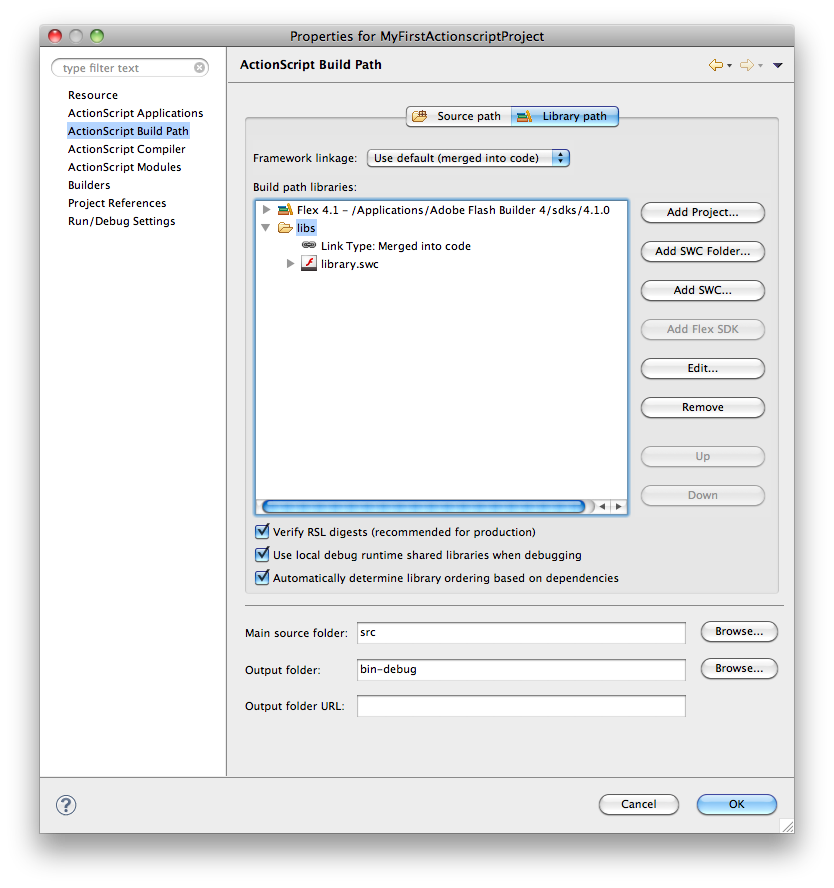
Now we must let the project know that he can use the .swc-files in the libs-folder. Right-click on the name of the project, go to Properties. Go to the ActionScript Build Path-tab and then to the Library path-view. Click Add SWC Folder and select your libs-folder. You should see this:

Now your .swc-file is linked with your Flash Builder project, click Ok.
Preloader
We have a very small .swc-file, with only one MovieClip. But when you have lots and lots of graphics, MovieClips and sound, your .swc-file will soon become bigger. When your .swf-file is loading all these data, we want to give the user some feedback. We can do this by making a preloader.
In the constructor of your Main.as, add these lines of code:
1 2 3 4 5 6 7 8 9 10 11 12 13 14 15 | |
We look at the loaderInfo of the SWF tho check if all data is loaded. If not, we add two eventlisteners to the loaderInfo. Next, add these functions to the Main-class:
1 2 3 4 5 6 7 8 9 10 11 12 13 14 15 | |
The progress-function contains some simple math to trace the progress of the preloader. You can also use this value so visualise the progress.
Now we have to write the preloaderCompleteHandler, but first a little more info about preloaders and Flash.
When the SWF is loading, it will not play until every classe you have used on the first frame is loaded. So we will add a second frame to the Flash Builder project, where you can use as much classes as you want. On the first frame, we will use as little classes as possible.
This way, the SWF will show the first frame (where we will show a preloader), and when everything is loaded, we jump to the second frame.
To make this work, we first have to make a second class, I name it ‘Application.as’ and put it in a package named ‘be.devine’.
Again, right click on your Flash Builder project and go to ‘Properties’. In the ‘ActionScript Compiler’-tab, put this in the ‘Additional compiler arguments’: “-frame “start” be.devine.Application”. This creates a second frame for your project. You should have this:

Go to your Main.as class and change the superclass to ‘MovieClip’ instead of Sprite. You have to do this because we want multiple frames (one frame for the preloader and a second frame for the application itself) and a Sprite doesn’t have a timeline.
The last thing we have to write is the preloaderCompleteHandler. Add these lines to the function:
1 2 3 4 5 6 7 8 9 | |
You see I’ve used the asterisk, this is used like a ‘joker’. So the ‘application’ variable can be any class, but is doesn’t make a explicit reference to the Application-class. This makes sure the that the SWF will not wait until the Application-class is loaded before showing up the preloader.
Testing the preloader
To make sure the preloader is working properly, I’ve added a big image (3.8 MB) in the Application-class.
When you debug the project, you will see a lot of traces with the current status of te preloader, when the application is loaded, the Application-class will trace “Hello World”.
Source files
You can download the example project and play around with it.
I hope you learned something from this. Please, do not hesitate to comment with your opinion, doubts, feedback…